Friday, 30 April 2010
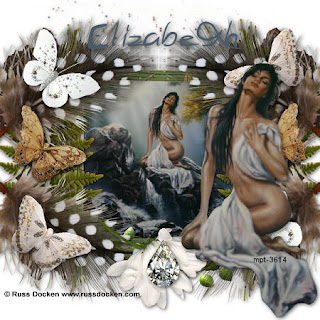
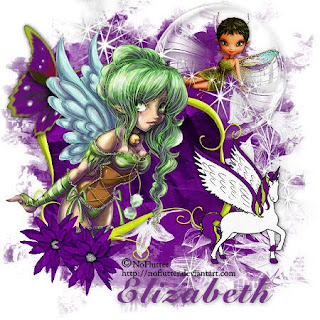
Enchanted Secret ptu.
This tutorial was written by Elizabeth on 30/04/2010 using psp9.
Any similarities to any other tutorial is purley coinsidental.
This tutorial is written for those with a working knowledge of psp.
Stunning kit from Imortal Dreams
Nik's mask 21 sorry a ptu one and lost link.
Tube of choise.
Font of choise, i used Cursive Elegant.
Dropshadow 1,1,50,11, black, dropshadow as you go.
Remember to save often.
New image 600x600 flood fill white.
Open paper 11>resize by 85%>c/p
Layers>new mask>find your mask>apply>ok.
Layers>merge group.
Open frame 3>resize by 65%>c/p.
Open sparkles>c/p>place so looks nice.
Open bubble>resize by 35%>c/p>place top right.
Open poser 2>resize by 40%>c/p>move below bubble.
Open butterfly 1>resize by 40>c/p place top left.
Open unicorn>resize by 40%>c/p place bottom right.
Click on your frame layer.
Magic wand>selections>modify 10.
Open paper 18>c/p>selections>invert>delete>selections none.
Move below frame.
Open your tube>c/p>you may have to resize.
Open flower 9>resize by 25%>c/p>duplicate>merge down.
Duplicate>move a little down.
Layers >merge visable>resize by 75%.
Layers>new raster layer>add your copyright & licence number.
Layers>merge visable.
Layers>new raster layer>add your name.
Layers >merge visable.
That's it you are done, i hope you enjoyed this tutorial.
Elizabeth x.
Tuesday, 27 April 2010
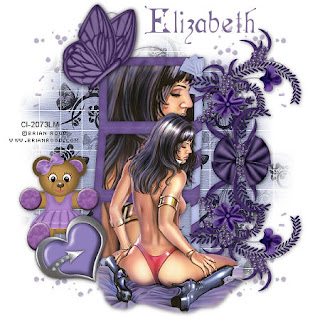
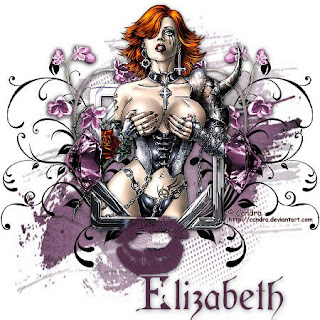
Toxic Intentions
This tutorial was written by Elizabeth on 27/04/2010 using psp 9.
Any similarities to any other tutorial is purley coincidental.
This tutorial is written for those with a working knowledge of psp.
Stunning kit from Imortal Dreams
bp mask 9 from here open and minimise.
Tube of choise i used a free to use artist.
Font of choise i used Cymbeline sorry no link.
Dropshadow 1,1,50,11,black, dropshadow as you go.
Remember to save often.
New image 600x600 flood fill white.
Open paper 1>resize by 75%>c/p.
Layers>new mask layer>find your becky mask 9>apply>ok.
Open frame 4>resize by 65%>c/p>adjust>sharpen>adjust>sharpen more.
Open diamond 1>resize by 15%>c/p>place on right>duplicate>mirror.
Open doodle 1>resize by 50%>c/p>duplicate>mirror.
Open flower 5>resize by 50%>c/p>duplicate>merge down>duplicate>mirror.
Open lips>resize by 35%>c/p>place bottom of frame>i erased the bits in the mouth.
Open your tube>you may have to resize>c/p.
Layers> merge visable>resize by 75%.
Layers>new raster layer>add your copyright & licence number.
Layers>merge visable.
Layers>new raster layer>add your name.
Layers> merge visable.
That's it you are done. i hope you enjoyed this tutorial.
Elizabeth x.
Monday, 26 April 2010
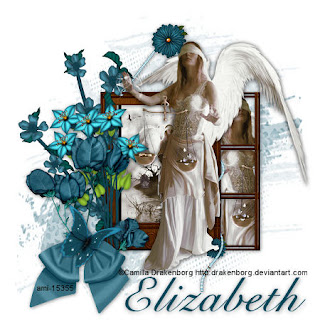
Blind Justice - kit Sarah azul
This tutorial was written by Elizabeth on 26/04/2010 using psp9.
Any similarities to any other tutorial is purley coincidental.
This tutorial was written for those with a working knowledge of psp.
Stunning kit from Fantasy Dreams
Becky mask 9 from here open and minimise.
Tube of choise you must have a licence if using the one i used.
Font of choise i used cygnetround sorry no link.
Dropshadow 1,1,50,11, black, dropshadow as you go.
Remember to save often.
I have called this tutorial Blind Justice.
New image 600x600 flood fill white.
Open paper 11>c/p.
Layers>new mask>find you bp mask 9>apply>ok.
Open frame 5>resize by 65%>c/p.
Open flower 9>mirror>c/p>place near frame.
Open flower 4>c/p >place on left.
Open flower 13>c/p>erace a little of the stem>place above flower 4.
Open bow 5>resize by 65%>c/p>place on stem flowers.
Open butterfly 3>resize by 55>c/p>place on bow.
Click on your frame layer>magic wand on the large window>selections>modify 10.
Add your tube>selections>invert>delete>selections none>move below frame.
Click on the three windows holding your shift key down>using the same process add your tube.
Add your tube again if wanted.
Layers>merge visable>resize by 75%.
Layers >new raster layer>add your copyright & licence number.
Layers> merge visable.
Layers >new raster layer>add your name.
Layers> merge visable.
Thats it you are done, i hope you enjoyed this tutorial.
Elizabeth x
Sunday, 25 April 2010
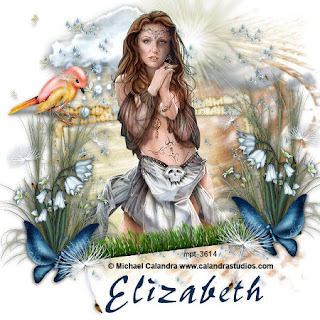
April showers
This tutorial was written by Elizabeth on 25/04/2010 using psp9.
Any similarities to any other tutorial is purley coincidental.
This tutorial is written for those with a working knowledge of psp.
Awesome kit from Gothic Inspirations
Candy's treats mask 5b sorry lost link. open and minimise.
Tube of choise mine from mpt.you must have licence to use this art.
Font of choise.
Dropshadow 1,1,50,11, black dropshadow as you go.
Remember to save often.
New image 600x600 flood fill white.
Open paper 15>c/p.
Layers >new mask >candy's mask 5b>apply>ok>layers>merge group.
Open frame 1>resize by 55%>c/p.
Open cloud >resize by 45%>c/p>place top right.
Open cloud 2>resize by 45%>c/p>overlap cloud 1.
Open firefly>resize by 55%>c/p>move top left.
Open flower1> resize by45%>c/p>move bottom right.
Open flower (snowdrop)>resize by 35%>c/p.
Open butterfly>resize by 35%>c/p.
Flower,flower1and butterfly>merge>duplicate>mirror.
Open doodle 4>resize by 35%>c/p>place top right.
Open exotic bird>resize by 35%>c/p>mirror.
Open dandilions>resize by 75%>c/p>duplicate>mirror.
Open grass>resize by 65%>free rotate 7 left>c/p>place on frame.
Open raindrops>resize by 65%>c/p>duplicate twice.
Open your tube>c/p>you may have to resize.
Open light>resize by 65%>c/p>move beind you tube a little to the right.
Layers >merge visable>resize by 75%.
Layers>new raster layer>add your copyright & licence number.
Layers>merge visable.
Layers>new raster layer>add your name.
Layers >merge vi sable.
That's it you are done. i hope you enjoyed this tutorial.
Elizabeth x.
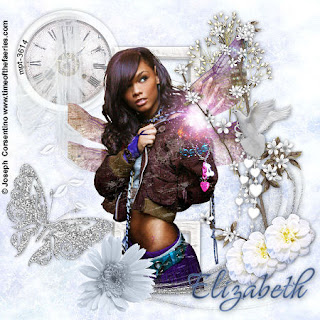
Summer white ptu
This tutorial was written by Elizabeth on 25/04/2010 using psp 9.
Any similarities to any other tutorial is purley coincidental.
This tutorial is written for those with a working knowledge of psp.
Stunning kit Summer white
Font of choise
Dropshadow 1,1,50,11 black dropshadow as you go.
Tube of choise i used one from mpt you must have a licence to use this art.
Remember to save often.
New image> 600x600 flood fill white.
Open paper 1>resize by 75%.
Open frame 1 doodle>resize by 75%>c/p.
Open clock>resize by 25%>c/p>move below frame>change opacity to 50.
Open Drapemoon>resize by 25%>c/p>place on top frame.
Merge frame,clock,drapemoon.
Open frame 3>resize by 45%>c/p.
Open babiesbreath>resize by 45%>c/p>move to right>errase some stem.
Open branches 2>resize by 45%>c/p>place over babybreath.
Open glitterspray>resize by 45%>c/p>place by frame 3.
Open beads>resize by 45%>c/p>place center branches.
Open butterfly 4>free ratote 35 right>resize by 75%>c/p>place bottom left.
Open dove>resize by 25%>c/p>place on bow.
Open flower 2>resize by 35>c/p>place bottom left.
Open flower 12>resize by 35%>c/p>place bottom right>duplicate twice.
Open your tube>you may have to resize it.
Layers> merge visabel>resize by 75%.
Layers >new raster layer>add your copyright & license number.
Layers >merge visable >layers >new raster layer>add your name>merge vi sable.
That's it you are done, i hope you enjoyed this tutorial.
Elizabeth x.
Mediteranian dawn
This tutorial was written by Elizabeth on 25/04/2010 using psp9.
Any similarities to any other tutorial is purley coincidental.
This tutorial is written for those with a working knowledge of psp.
Stunning kit Mediteranian dawn
Gems mask 172 here open and minimise.
Two tubes of choise i used a free to use artist.
Font of choise.
Dropshadow 1,1,50,11,black. dropshadow as you go.
Remember to save often.
New image 600x600 floodfill white.
Layers>new mask>find gems mask 172>apply>ok.
Layers >merge group.
Open multi-frame 4>resize by 55%>free rotate 90 left>c/p.
Open flower 16>resize by 65%>c/p>Duplicate>merge down.
Duplicate>flip.
Open flower 5>resize by 55%>c/p.
Open bird>image>mirror>resize by 35%>duplicate as often as you want.
Click on your frame layer>magic wand>click on each segment frame
hold shift key down>selections>modify by 10>add your tube>selections>invert>delete>selections none>move below frame.
Add your second tube & any other elements you want.
Layers> merge visable>resize by 75%.
New raster layer> add your copyright and licence number.
Layers >merge visable.
New raster layer> add your name>layers>merge vi sable.
That's it you are done, i hope you enjoyed this tutorial.
Elizabeth x.
Thursday, 22 April 2010
Lavender Spring ptu
This tutorial was written by Elizabeth on 22/04/2010 using psp 9.
Any similarities to any other tutorial is purley coincidental.
This tutorial was written for those with a working knowledge of psp.
Stunning kit from Imortal Dreams
Yez mask 19 here open & minimise
Font of choise > i used BeauRivageTwo, sorry no link.
Tube of choise i used one from MPT you must have a licence to use this art.
Drop shadow 1,1,50,10, black dropshadow as you go.
Remember to save often.
New image 600x600 flood fill white.
Open paper 16>resize by 75%>c/p.
Image>new mask find your Yez mask19>apply>ok.
Layers>merge group>resize by 123%.
Open cloud>resize by 55%>c/p>move top right.
Open frame 8>resize by 65%>c/p.
Open flower 4>free rotate 90 left>resize by 55%>image mirror>c/p>place
on frame bow >erace a bit of stem.
Open flower 8>resize by 45%>c/p>move below raster 3.
Open glitter doodle>resize by 65>c/p>duplicate>merge down.
Open flower 1>resize by 35%>c/p>move bottom left.
Open your tube>c/p>duplicate your frame>move to the top>erace any covering your tube.
Layers>merge visable>resize by 75%.
New raster layer>add your copyright & licence number.
Layers >merge visable>new raster layer add your name.
Layers merge visable.
Thats it you are done. i hope you enjoued this tutorial.
Elizabeth x
Monday, 19 April 2010
Sunday, 18 April 2010
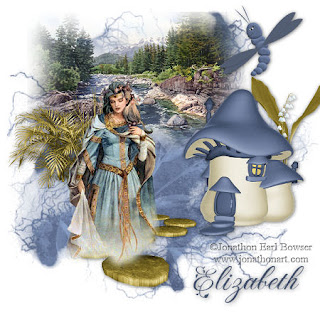
Ophelia wings of spring kit, ptu.
This tutorial was written by Elizabeth on 18/04/2010 using psp9.
Any similarities to any other tutorial is purely coincidental.
This tutorial is written for those with a working knowledge of psp.
Beautiful kit from Crazed creations
Mask DMSK 0685 sorry lost link. open your mask & minimise.
Tube of choise, i used a free to use artist.
Font of choise, i used fleur de leah.
Dropshadow 1,1,50,11, black, drop shadow as you go.
Remember to save often.
New image 600x600 flood fill white.
Open paper 12>resize by 75%>c/p.
Layers>new mask>find your mask>apply>ok.
Layers >merge group.
Open your scene>resize by 65%>c/p>move a little to top.
Open mushroomhouse 4>resize by 65%>c/p>move to right.
Open greenery 1>resize by 45%>c/p>place by the scene.
Open grass >resize by 45%c/p>move next to greenery.
Open dragonfly 1>resize by 45%>c/p>move top right.
Open path>resize by 55%>c/p>place by house.
Open flower 1o >resize by 55%>c/p>move behind house.
Open your tube you may have to resize>c/p>place on path.
Layers >merge visable>resize by 75%.
Layers>new raster layer>add your copyright & licence number.
Layers >merge visable.
Layers>new raster layer>add your name.
Layers merge vi sable.
That's it you are done, remember a tutorial is just a guide.
hope you enjoyed this tutorial.
Elizabeth x
Endure Blanka ptu
This tutorial was written by Elizabeth on 18/04/2010 using psp 9.
Any similarities to any other tutorial is purley coincidental.
This tutorial is written for those with a working knowledge of psp.
Beautiful kit from Fantasy Dreams
Wsl mask 84 from here open and minimise.
Font Cardinal Alternate sorry no link.
Tube of choise i used one from cilm you must have a licence to use this art.
Dropshadow 2,2,50,11, black, dropshadow as you go.
Remember to save often.
New image 600x600 flood fill white.
Open paper 22>resize by 75%>c/p.
Layers>new mask>find your mask>apply>ok.
Layers >merge group.
Open element 62>free rotate 90> resize by 75%>c/p.
Open element 79>c/p>duplicate 3 times>move to the 4 edges.
below frame.
Open element 17>resize by 75%>c/p>duplicate>flip>merge down>resize again by 75%.
Open element 5>resize by 45%>c/p>place middle flowers.
Open element 58>mirror>resize by 65%>c/p>free rotate 35 right.
Open element 28>resize by 75%>c/p>place low left.
Open element 41>resize by 75%>free rotate 35 left>c/p>
place in front of doll.
Click on your frame layer>magic wand hold your shift key down and click on each frame>
open paper 2>c/p> selections>invert>selections>delete>selsctions>none.
Move paper below frame.
Click on each frame again>add your tube>selections>invert>selections>
delete>selections>none>move below frame.
Add your tube again>place so looks good.
Layers >merge visable>resize by 75%.
Layers>new raster layer>add your copyright & licence number.
Layers>merge visable>layers >new raster layer>add your name.
Layers merge vi sable.
That's it you are done, remember a tutorial is just a guide. try your own thing.
hope you enjoyed this tutorial.
Elizabeth x
Saturday, 17 April 2010
Destiny ptu
This tutorial was written by Elizabeth on 17/04/2010. using psp 9.
Any similarities to any other tutorial is purley coincidental.
This tutorial is written for those with a working knowledge of psp.
Awesome ptu kit from Gothic Inspirations
Mask from boundless bliss mask 1 sorry no link.
Font Celexa
Tube of choise.i used one from ami. you must have a licence to use this art.
Dropshadow 1,1,50,11, black, dropshadow as you go.
Remember to save often.
New raster layer 600x600 floodfill white.
Open paper 2 c/p.
Layers>new mask>look for your mask>apply>ok.
Open frame 1>resise by 65%>c/p.
Open parchment>free rotate 90 left>c/p>move below frame.
Open fog 1>c/p>move below parchment.
Open planet>resise by 55%>c/p>resise again>place top right.
Open mysticflair>resize by 75%>c/p>place over planet.
Open stairs>resize by 60%>c/p>place so top step near planet.
Open wizard>resize by 25>c/p>place top stairs.
Open book>resize by 50%>free rotate 34 left>c/p>resize again 65%.
Open dragon 6>resize by 50%>c/p>place on book>mirror>merge down.
Open dragon 1> mirror>resize by 65%>c/p>move bolow fog.
Open castle 1>resize by 60%>c/p>mirror>layer change to luminanse legacy.
Open fire 1>resize by 20%>c/p>place so looks like dragon breath.
Open netting>free rotate 90 >c/p> move to bottom>duplicate>mirror.
Open chain>resize by 55%>c/p>place on frame>duplicate>mirror.
Open your tube>c/p>place so looks good.
Layers>merge visable>resize by 75%.
New raster layer>add your copyright & licence number.
layers>merge visable.
New raster layer>add your name>layers>merge vi sable.
Thats it you are done, i hope you enjoyed this tutorial.
Elizabeth x.
Monday, 12 April 2010
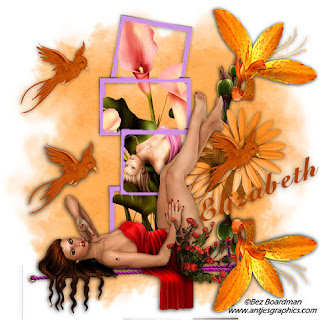
Mother Love
This tutorial was written by Elizabeth on 12/04/2010 using psp9.
Any similarities to any other tutorial is purely coincidental.
This tutorial is for those with a working knowledge of psp.
Beautiful kit from here
Gems mask 135 from here open and minimise.
Font of choise.
Tubes of choise i used a free to use artist.
Dropshadow 1,1,50,11, black dropshadow as you go.
And remember to save often.
Nice quick tutorial.
New image 600x600 floodfill white.
Open paper 8>resize by 75%>c/p>layers>new mask find your gems mask 135.
Apply>ok.
Open cluster frame>resize by 60%>c/p.
Open pin>resize by 55%>c/p>place top left frame.
Open butterfly 2>resize by 25%>c/p>move to top right frame.
Open jewel 5>resize by 55%>c/p>move to bottom right frame.
Open heartkey>resize by 55%>c/p>place by pin.
Open your tube, you may have to resize it, place it behind two left frame.
Open your second tube, again you may have to resize it,place behind two right frames.
Layers>merge visable>resize by 75%.
Layers> new raster >add your copyright & licence number.
Layers>merge visable>new raster layer>add your name.
Layers> merge vi sable.
That's it you are done. i hope you enjoyed this tutorial.
Elizabeth x
Sunday, 11 April 2010
Vindictive Pleasure kit by Gothic inspirations
This tutorial was written by Elizabeth on 11/04/2010 using psp9.
Any similarities to any other tutorial is purely coincidental.
This tutorial is written for those with a working knowledge of psp.
Stunning kit from Gothic Inspirations
Vix mask 173 from here open and minimise.
Font of choise.
Tube of choise i used one from mpt you must have a licence to use this art.
Dropshadow 2,2,50,11, black dropshadow as you go.
New image 600x600 flood fill white.
Open paper 4 >c/p.
Layers>new mask>look for your vix mask>apply>ok>merge group.
Open mesh>c/p> place a little to the left.
Open parchment>resize by 75%>c/p>place on left.
Open brick>resize by 65%>c/p>free rotate 90 left>place on top of parchment.
Open frame 1>resize by 65%>c/p>place on top of brick.
Open flowers>resize by 65%>mirror>c/p>place top right.
Open light>c/p>mov so its over one of the flowers.
Open plant>resize by 65%>c/p>mirror>erace any hanging over.
Open leaves>resize by 60%>free rotate 90 left>c/p>place on right.
Open leaves 2>free rotate 54 right>resize by 60%>c/p>place on top leaf 1.
Open rose> resize by 75%>c/p>move to bottom of frame.
Open metal 1>resize by 40%>c/p>move to bottom right.
Adjust >sharpen>adjust>sharpen more.
Open lamp>resize by 55%>c/p>place top left.
Click on frame >magic wand>add your tube.
I eraced any parts frame that i did not want.
Layers> merge visable>resize by 75%.
New raster layer>add your copyright & your licence number.
Layers>merge visable>new raster layer>add your name.
Layers merge visable.
Thats it you are done, i hope you enjoyed this tutorial.
Elizabeth X.
Zen, kit by skyscraps.blogspot.com
This tutorial was written by Elizabeth on 11/04/2010 using psp9.
Any similarities to any other tutorial is purley coincidental.
This tutorial is for those with a working knowledge of psp.
Yez mask 12 from here Open & minimise.
Awesome kit from skyscraps
Tube of choise i used one from mpt you must have a licence to use this art.
Font of choise.
Dropshadow 1,1,50,11, black, dropshadow as you go.
Remember to save often.
New image 600x600 flood fill white.
Open paper 9 > resize 75%>c/p.
Layers new mask>find your Yez mask 12>apply>ok.
Layers merge group.
Open dust >resize by 75% >c/p> move top right.
Open frame 2>resize by 75%>c/p.
Open element 2 >rotate 90% right>c/p>move under frame>duplicate>mirror.
Open butterfly 1>resize by 35%>free rotate 35% right>c/p >duplicate>merge down.
duplicate>mirror>move these to where you want them.
Open butterfly 3>resize 40%>free rotate 29 % right > repete step for butterfly 1.
Open butterfly 4 >repete steps for butterfly 1.
Open foilage 2>resize by 65%>c/p>place bottom of frame.
Open foilage 10>free rotate 60% right>place above the bark.
Open feather 2>resize by 85%>c/p>free rotate 60% left>duplicate mirror.
Merge the two feathers>duplicate>flip.
Open flower 2 >resize by 55%>c/p> move to bottom of frame.
Open diamond>resize by 55%>c/p>place on top of flower 2.
Click on your frame layer>magic wand>selections>modify 10>add your tube.
Selections>invert>selections>delete>selections none.
Add your second tube.
Layers>merge visable>resize by 75%.
New raster layer> add your copyright & licence number.
Layers>merge visable>new raster layer> add your name>merge visable.
Thats it you are done. i hope you engoy this tutorial.
Elizabeth x.
Thursday, 8 April 2010
Here kitty kitty
This tutorial was written by Elizabeth on 08/04/2010 using psp9.
Any similarities to any other tutorial is purley coincidental.
This tutorial was written for those with a working knowledge of psp.
Stunning kit from Wishing on a star Here
Wls mask 192 from here open mask & minimise for now.
Tube of choise i used a CILM tube you must have a licence to use this art.
Font of choise.
Dropshadow 1,1,50,11, black dropshadow as you go.
New image 600x600 flood fill white.
Open paper 2>c/p>layers>new mask>apply>ok
Layers>merge group.
Open frame>resize by 75%>c/p>free rotate 90%left.
Open berries>c/p>free rotate 90% left>erace any bits overhanging.
Open flower>c/p>free rotate 90% left>place on top of flower.
Open dust> c/p> move below flowers.
Open bubbles>c/p>place on left.
Open rush>resise by 75%c/p>place on top flowers.
Open bow>resize by 35%>c/p>place on top flowers.
Open bird>resize by 45%>image>mirror>place topmiddle of frame.
Open wing>resize by 45%c/p>place on top of bow.
Duplicate>merge down>duplicate>mirror.
Add your tube you may have to resize it.
Layers>merge visable>resize by 75%.
New raster layer>add your copyright & licence number.
Layers >merge visable>new raster layer add your name.
Layers>merge visable.
Thats it you are done, i hope you enjoy this tutorial.
Elizabeth x
Wednesday, 7 April 2010
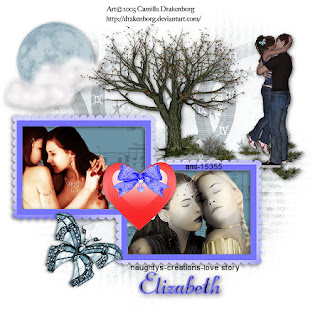
Love Story,
This tutorial was written by Elizabeth on 07/04/2010 using psp9.
Any similarities to any other tutorial is purley coincidental.
This tutorial was written for those with a working knowledge of psp.
Stunning kit from here Naughtys-Creations.
Wsl mask 81 from here open mask and minimise for now,
Font of choise.
Tube of choise.
Dropshadow 1,1,50,10, black dropshadow as you go.
New image 600x600 flood fill white.
Open paper 10> c/p.
Layers>new mask>find wsl mask 81>apply>ok.
Layers>merge group.
Open Tree>resize by 65%>c/p>place top right.
Open moon cloud>resize by 65%>c/p>place top left.
Open frame 1>resize by 75%>c/p.
Open butterfly gem>resize by 65%>free rotate 35% right.
c/p>resize again by 65%.
Open bella & edward>c/p>you may have to resize it>
lower opacity to 84.
Click on frame magic wand holding shift key down, both frames.
Open paper 14> c/p >selections>invert>delete>selections>none.
move below frame.
Click on frame again and add you tube>move bolow frame.
Layers> merge visable>resize by 75%.
Add new raster layer>add your copyright & licence number.
Add new raster layer add your name.
Layers >merge visable.
Thats it you are done, i hope you enjoyed this tutorial.
Elizabeth x
Sunday, 4 April 2010
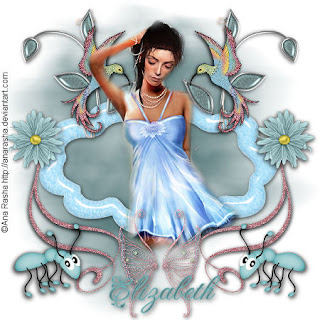
spring fling
This tutorial was written by Elizabeth on 04/04/2010 using psp9.
Any similarities to any other tutorial is purely coincidental.
This tutorial is written for those with a working knowledge of psp.
Stunning kit by babyV here
Mask becky mask 23 sorry no link. open your mask and minimise.
Tube of choise i used i free to use artist Ana Rasha.
Font of choice.
Dropshadow 2,2,50,10, black dropshadow as you go.
Open new image 600x600 flood fill white.
Open flower 2>pick a shade from it.
Layers>new raster layer>flood fill from colour flower.
Layers>new mask>find your mask>apply>ok>layers> merge group.
Open cloud frame>c/p.
Open wireleaves>resize by 75%>free rotate 90% right>c/p>
place on string of frame>erace any overhanging>duplicate>mirror.
Open hummingbird 1>resize by 45%>c/p>place on top of wireleaves.
Open swirl 1>resize by 65%>c/p> place bottom right>duplicate>mirror.
Open glitterbutterfly>resize by 45%>c/p>place bottom center.
Open flower 2>resize by 45%>c/p>place half way down>duplicate>mirror.
Open ant 3> resize by 55%>c/p>place bottom left>duplicate>mirror.
Layers>merge visable>resize by 75%.
Layers>new raster layer>add your copyright & licence number.
Layers>merge visable>new raster layer>add your name>merge visable.
Thats it you are done, i hope you enjoyed this tutorial.
Elizabeth x
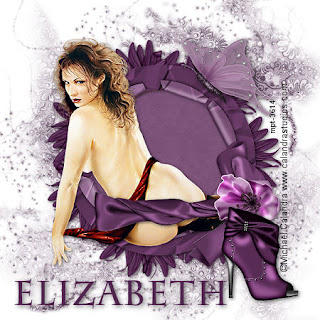
Shemani
This tutorial was written by Elizabeth on 04/04/2010 using psp9.
Any similarities to any other tutorial is purley coincidental.
This tutorial is written for thoses witha working knowledge of psp.
Beautiful kit from Fantasy dreams designs
Gems mask 114 here open and minimise for now.
Tube of choise i used an mpt tube you must have a licence to use there art.
Font of choise.
Dropshadow 1.1.50.11.black dropshadow as you go.
Filter mura's copies here link was working when i got it.
New image 600x600 flood fill white.
Open paper 10 >add it as a pattern in your background & angle 31,scale 27.
Layers >find your gems mask 114 >apply>ok
Layers> merge group>resize by 120%.
Open element 21>c/p> resize by 65%.
Open element 38>c/p>resize by 65%>Effects> find you mura's filter.
Settings> circle >number 7 > background white>move below frame.
Click inside frame>magic wand>selections>modify 10.
Open paper 4>c/p>selections>invert>delete>selections>none.
Move below frame.
Open element 3> resize by 65%>c/p>move to bottom of frame.
Open element 11>resize by 55%>c/p>place on top of bow.
Open element 33>resize by 75%>c/p>place top of frame.
Duplicate>merge down.
Open element 71>resize by 65%>c/p>place bottom right.
Open your tube>you may have to resize it>place below bow.
Layers>merge visable>resize by 75%.
Layers>new raster layer>add your copyright & licence number.
Merge visable>new raster layer>add your name>merge visable.
That's it you are done, i hope you enjoyed this tutorial.
Elizabeth x.
Subscribe to:
Posts (Atom)