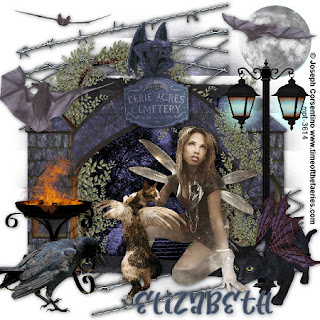
This tutorial was written by Elizabeth on 12,09,2010 using psp 9.
Any similarities to any other tutorial is purley coincidental.
This tutorial is for those with a working knowledge of psp.
~~~~~~~~
A Fantastic kit by Dianna at Scraps and the City.
Weescotslass mask 34 from here open and minimise.
Tube of choice i used one from MPT.
Font of choice i used Chillin One.
Dropshadow 1,1,30,10, black, dropshadow as you go.
Remember to save often.
Use my tag for element placement.
~~~~~~~~
Ok grab that coffee and those munchies lets begin.
~~~~~~~~
New image 600x600 flood fill white.
Open paper 14 > resize by 75% > c/p.
Layers > new mask > find wsl mask 34 > apply > ok.
Layers > merge group.
~~~~~~~
Open frame 8 > resize by 50% > c/p.
Open paper 12 > resize by 75% > c/p.
Highlight frame layer > magic wand in frame > selections > modify > expand by 10.
Selections > invert > delete > selections > select none.
~~~~~~~~
Open barbed wire 1 > resize by 50% > duplicate > merge down > flip > mirror > c/p.
Open arch > resize by 85% > c/p.
Open cemetry sign > resize by 30% > c/p.
Open bat 1 > resize by 55% > c/p.
Open bat 4 > resize by 45% > mirror > c/p.
Open bat 2 > resize by 45% > c/p.
Open moon > resize by 40% > c/p.
Open gothic flames > resize by 45% > cp/.
Open raven > resize by 45% > c/p.
Open streetlight > resize by 55% > c/p.
Open winged cat > resize by 45% > c/p.
Add your tube > you may need to resize it.
~~~~~~~~
Layers > merge visible > resize by 75%.
Layers > new raster layer.
Add your copyright and license number.
Layers > merge visible.
Layers > new raster layer.
Add your name.
Layers > layers merge visible.
~~~~~~~~
That's it you are done, i hope you enjoyed this tutorial.
Elizabeth x.


No comments:
Post a Comment