Sunday 28 February 2010

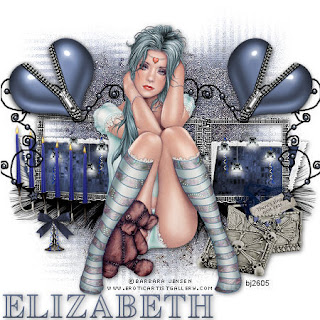
misery


Stunning kit from blackwidow here

Purple Passion Ptu


This tutorial was written by Elizabeth on 28/02/2010 using psp9.
Any similarities to any other tutorial is purley coincidental.
This tutorial is written for those with a working knowledge of psp.
Stunning kit from here
Gems mask from here i used mask 158, Open and minimise for now.
Tube from here you must have a licence to use this art.
Font of choise
Dropshadow 2,2,58,11, black dropshadow as you go.
Ok we have all we need, grab that coffee and lets begin.
New image 600x600 flood fill white>open paper 9>resize by 75%> c/p >new mask layer
find mask 158>apply>ok.
1) Open frame 1> resize by 50%> c/p move a little to the left.
2) Open butterfly 1>resize by 45%> c/p move to top of frame.
3) Open flowerspray 2 >resize by 45% >c/p move to bottom of frame.
4) Open ribbon 3 >free rotate 90% left >resize by 55% move to right side of frame, erace any over hanging ends. move below frame.
5) Open flowerswirl 2 > resize by 45%> c/p > move to top left under frame>duplicate>repete untill you have 4 flowers.
6) Click on your frame> hold down your shift key and click inside both frames with your magic wand> selections> modify by 10> open paper 2>resize by 75%>c/p > selections >invert> delete>selections none> move below frame.
7) Open your tube> click on your frame with your magic wand> hold shift key down both frames>c/p your tube > possition how you want on frame>selections>invert>delete.
Copy and paste your tube again and move a little to the right.
Layers merge visable>resize by 75%>new raster layer, add your copyright, licence number> merge visable> new raster layer add your name >merge visable.
Thats it you are done. i hope you enjoyed this tutorial. Elizabeth

Monday 22 February 2010

Blue moon magic ptu


A beautiful kit from here

Dark spirit ptu


Dark spirit same awesome kit total different tag.

Dark spirit ptu


Awesome kit from here

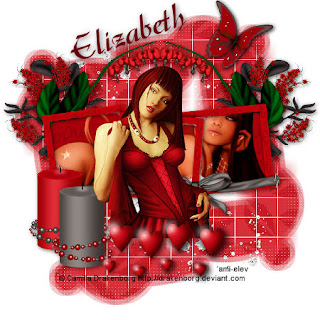
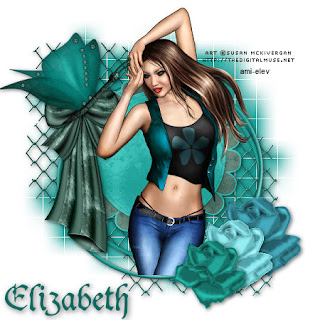
Antique Rose ptu


This tutorial was written by Elizabeth on 22/02/2010 using psp9.
Any similarities to any other tutorial is purley coincicental.
This tutorial is written for those with a working knowledge of psp.
Stunning kit from here
Font of choise i used Fleurdeleah sorry no link.
Dropshadow of choice.
Tube of choise i used one from ami, you must have a licence to use this art.
Ok grab your coffee, and lets begin.
Its not a very nice day its snowing again, just a day for psping.
New image 600x600 flood fill white
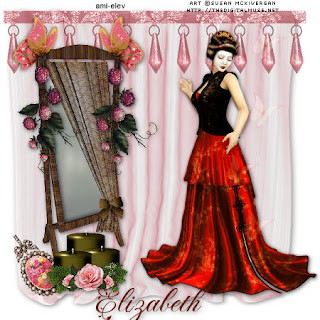
1> Open curtain 1 >c/p > with your deform tool stretch the curtain untill it nearly fits image.
2> Open butterfly 6 >resize by 23 %> c/p > change opacity to 54> c/p these all over the curtain.
3> Open mirror> resize by 75% >c/p> move to the left.
4> Open berrybranch >free rotate 90% left> resize by 33% >c/p > place left side of mirror>
duplicate>mirror.
5> Open butterfly 5 > resize by 33% >c/p > place above berrybranch>duplicate>mirror.
6> Open Broach > free rotate 33%right >resize by 33% > c/p >place bottom of mirror.
7>Open candel 2 >resize by 45% >c/p > place it in front of broach.
8>Open dangle 1 >resize by 45% >reduce opacity to 50> c/p>move it top of curtain.
9>Open your tube and place so looks good.
10> Layers merge visable >resize by 75%.
11>New raster layer >add your copyright and your licence number>merge visable.
12>new raster layer >add your name>layers merge visable.
Thats it you are done, 12 steps to make a beautiful tag, i hope you enjoyed this tutorial.
Elizabeth

Sunday 21 February 2010

Always ftu


This tutorial was written by Elizabeth on 21/02/2010 using psp9.
Any similarities to any other tutorial is purley coincidental.
This tutorial is written for those with a working knowledge of psp.
Beautiful ftu kit from here
Wsl mask from 84 here open and minimise for now.
Tube i used a tube from ami here you must have a licence to use this art.
Font of choice i used dukeplus sorry no link.
Dropshadow 2,2,58,11, black, dropshadow as you go.
A beautiful colour to work with. ok grab your coffee, and let's begin.
New image 600x600 flood fill white>new raster layer>flood fill from a colour element>
Layers>new mask>apply>ok.
1> Open element 19 > c/p > center.
2> Open element 64 > c/p > center.
3> Open element 24 > resize by 37% > c/p > move bottom right.
4> Open element 23 > resize by 33% > c/p > move in front of first flower.
5> Open element 25 > resize by 29% > c/p > move in front of second flower.
6> Open element 49 > resize by 75% > image free rotate 33% right> c/p >
duplicate>merge down> move top left.
7> Open element 58> resize by 67% > c/p > move below butterfly.
8> Open your tube > c/p > you may need to resize to fit.
9 > Layers merge visable > resize by 75%.
10> Add your copyright > licence number> layers merge visable.
11> New raster layer > add your name> merge visable.
Thats it you are done, i hope you enjoyed this tutorial, Elizabeth.

Saturday 20 February 2010

Belive ftu


Beautiful kit from here

Lightning strikes ptu


Beautiful kit here

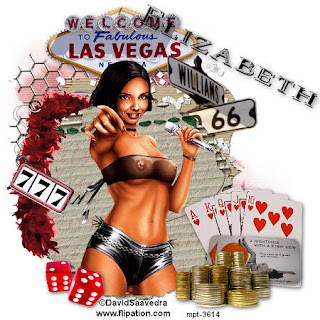
Sin City ptu


This tutorial was written by Elizabeth on 20/02/2010 using psp9.
Any similarities to any other tutorial is purley coincidental.
This tutorial is written for those with a working knowledge of psp.
Sin City Kit here
Gemsmasks here i used mask 134 Open and minimise for now.
Tube i used David saavedra from mpt you must have a licence to use this art.
Font of choise
Dropshadow 2,2,58,11, black dropshadow as you go.
A nice quick easy tut, ok grab your coffee and lets begin.
New image 600x600 flood fill white>c/p >paper 7>layers>new mask>apply>ok.
Open mesh>resize by 75%>c/p>move a little to the left.
Open vegassign>resize by 43%>c/p move to top.
Open cluster frame>resize by 65%>c/p>center.
Open accesscard>resize by 41%>c/p move bottom right.
Open coinpile>resize by 38%>c/p move bottom right.
Open cards>resize by 45%>c/p move behind access card.
Open chainwcharm>resize by 45%> c/p>move to the left.
Open dice 2>resize by 45% >c/p move to bottom left.
Open you tube>resize to fit on cluster frame.
Layers merge visable>resize by 75%>new raster layer>add yur copyright, licence number.
New raster layer>add your name>layers merge visable.
Thats it you are done i hope you enjoyed this tutorial, hugs Elizabeth

Friday 19 February 2010

Sin City Sampler Kit


Awesome from here

Looking Ftu


This tutorial was written by Elizabethon 19/02/2010 using psp9.
Any simolarities to any other tutorial is purley coicidental.
This tutorial is written for those with a working knowledge of psp.
Awesome kit from here
wsl mask 99 from here open and minimise for now.
Font of choise.
Tube i used one from ami you must have a licence to use these tubes.
Dropshadow 2,2,58,11, black dropshadow as you go.
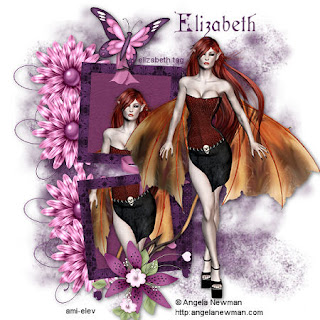
New image 600x600 flood fill white>open paper 26 resize by85%>c/p.
New mask layer find wsl mask 99>apply>ok>layers merge group.
Open element 12>resize by 75%>c/p place center.
Open element 15>resize 75%>c/p> move below frame.
Open element 22>resize by 41%>c/p>move below frame>duplicate>mirror.
Open element 51>resize by 55%>c/p>move below frame>duplicate>mirror.
Open element 29>resize by 55%>c/p>top right>duplicate>merge down.
Open element 37>resize by 55%>move to bottom left.
Open element 38>resize by 55%>move infront of element 37.
Click on frame layer>magic wand hold shift key down click inside all 3 frames>selections>modify by 10>open paper 6>c/p >selections >invert>delete>move below frame.
Click on frame layer>magic wand hold down your shift key click inside all 3 framesc/p your
tube>selections>invert>delete.
Copy and paste your second tube.
Layers merge visable>resize by 75%>new raster layer>add your copyright & licence number>
Layers merge visable>new raster layer>add your name>merge visable.
Thats it you are done, i hope you enjoyed this tutorial, Elizabeth.
Thursday 18 February 2010

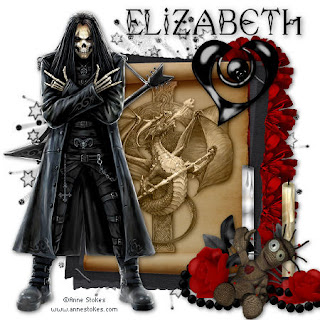
stunning new kit by wicked princess


This tutorial was written by Elizabeth on 18/02/2010 using psp9.
Any similarities to any other tutorial is purley coincidental.
This tutorial is written for those with a working knowledge of psp.
Stunning kit here
Mask ufmask 42 here open and minimise for now.
Tube i used a free to use artist anne stokes.
Dropshadow 2,2,58,11, black dropshadow as you go.
New image 600x600 flood fill white>open paper 18>resize by 60%.
Layers>new mask>apply>ok.layers merge group.
Open double frame>resize by 75%>c/p >place in the center.
Open scroll>resize to fit frame.
Open bloodbloom>resize by 50%>place under frame>duplicate move down>do this untill you have 5 flowers.
Open candlerose >resize by 50%>place bottom right.
Open heart clip>resize by 60%>place top right.
Open your tube>c/p onto the scroll>click on deform tool and shrink it to fit inside scroll>change
blend mode to luminance (legacy).
Open voodoo>resize by 61%>free rotate right 28%>move in front of candlerose.
Open your other tube c/p > i did not resize this one.
Layers merge visable>resize by 75%>Layers new raster layer>add your copyright>merge visable.
New raster layer>add your name>merge visable.
Thats it you are done. i hope you enjoyed this tutorial, Elizabeth

Sunday 14 February 2010

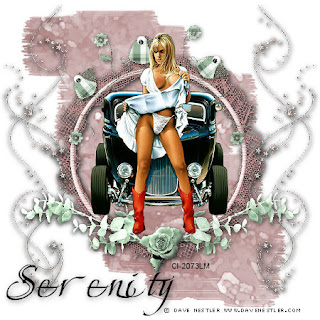
Country Romance


This tutorial was written by Elizabeth on 14/02/2010. using psp9.
Any similarities to any other tutorial is purley coincidental.
This tutorial is written for those with a working knowledge of psp.
Beautiful kit here
Mask 61 from here open and minimise mask for now.
Tube of choise i used dave nestler if you use this image you must have a licence.
Font of choise i used beaurivagetwo sorry no link.
Dropshadow 2,2,58,11,black. dropshadow as you go.
New image 600x600 flood fill white>open paper 13>resize by 20%>c/p.
Layers>new mask>ufmask 61>click on invert mask data>ok>merge group>opacity 50.
Open frame 1.resize by 15%> c/p.
Open wireornament 3>resize by 20%>place on top of frame>duplicate>merge down.
Open frippery 3>resize by 15%> c/p >free rotate 90% right>duplicate>merge down>duplicate>mirror.
Open branch 5>resize by 10%>duplicate>mirror.
Open flower 2>resize by 10%> c/p > place in center of branches.
Layers merge visable>resize by 75%>new raster layer>add your copyright>licence number.
Layers merge visable>new raster layer>add your name.
Thats it you are done, a nice quick tutorial.
Ihope you enjoyed this tutorial. Elizabeth x

Saturday 13 February 2010

Birthday Blues


This tutorial was written by Elizabeth on 13/02/2010 using psp9.
Any similarities to any other tutorial is purley coincidental.
This tutorial is written for those with a working knowledge of psp.
Awesome kit from here
Mask wsl 81 from here open and minimise mask for now.
Font Euclid math two, sorry no link.
Drop shadow 1,1,58,11,black, drop shadow as you go.
Tube i used Barbara Jensen you must have a licence to use this art.
New image 600x600 flood fill white
Open paper 11>resize by 75%> c/p >resize by 75%.
Image>new mask>find wsl mask 81>apply>ok>layers>merge Group.
Open frame 3>resize by 65% > c/p >center > Image> plugin "locas" >default>change the colour
to white>ok.
Open gift box >resize by 45%>move to bottom right.
Open lights>resize by 30%>c/p>duplicate>mirror.
Open doodle>resize by 45% >c/p>click on deform tool drag down to fit frame, drag across to middle frame>duplicate>mirror>layers merge down.
Open candles resize by 45%> c/p move bottom left.
Open feather >resize by 65%>duplicate >mirror>merge down>move down.
Open heart >resize by 35%> free rotate 33% right>see my tag for place>duplicate>mirror.
Layers merge visable>resize by 75%.
New raster layer>add your copyright> licence number> layers merge visable.
New raster layer> add your name.
Thats it you are done,.
I hope you enjoyed this tutorial. Elizabeth

Tuesday 9 February 2010

nothing Ftu


This tutorial was written by Elizabeth on 09/02/2010 using psp9.

Any similarities to any other tutorial is purley coincidental.

This tutorial is written for those with a working knowledge of psp.


Awesome kit here

Mask here open mask 362 and minimise for now.

Tube of choise if you use the one i used you must have a licence.

Font of choice i used chocolateboxdecrotive.

Dropshadow>1,1,58,11,black, dropshadow as you go.


Open new image 600x600 flood fill white>new raster layer>flood fill with a colour from one of the elements.

Layers>new mask>apply>ok>layers >merga group >resize by 117%.

Open element 55>c/p>place in center.

Open element 15 >c/p >resize by 55% move to right>duplicate>merge down>duplicate>mirror>give it a dropshadow and inner bevel.
Bevel 4,width3,smothness35,depth2,ambience8,shininess10,colour white,angle315,intensity75,elevation20.
Open element 48>c/p move to bottom right>duplicate>merge down>duplicate>mirror.
Open element 11>resize by 35%>free rotate 33% right>move to top right>adjust>sharpness>sharpen>sharpness>sharpen more.
Layers merge visable>resize by 75%.
New raster layer>add your copyright>licence number>New raster layer>add your name.
Thats it, you are done, i hope you enjoyed this tutorial.
Elizabeth.

Sunday 7 February 2010

nca dark cravings blog train


Dark cravings blog train here
Tubes here

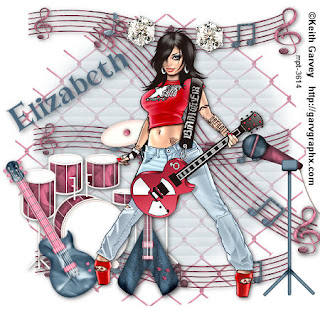
Heart Rock Cafe


This tutorial was written by Elizabeth on 07/02/2010 using psp9.
Any similarities to any other tutorial is purley coincidental.
This tutorial is written for those with a working knowledge of psp.
Awesome kit from here
Mask here Open and minimise mask 107 for now.
Font of choise
Tube of choise the one i used you must have a licence to use. (mpt)
Dropshadow> 1,1,58,11,black. dropshadow as you go.
Open new image 600x600 flood fill white >new raster>pick a colour from
one of the elements>flood fill>new mask>apply mask>ok.
Open element 39> resize by 70%>c/p move it below your mask>change visability to 60.
Open element 11>resize by 70% move to top of image>duplicate>move to center>
duplicate>move to bottom>duplicate>free rotate by 45%>move as my tag.
Open element 8 >resize by 60%>c/p move to bottom left.
Open element 1>resize by 60%>free rotate>by 30% left>c/p in front of drums.
Open element 4>resize by 60%>c/p move in front of drums.
Open element 6>image mirror>c/pbottom right.
Open element 12>c/p this element as often as you like.
Open element 45>resize by 60%>c/p place on top bar>duplicate>mirror.
Layers merge visable>resize by 75%.
New raster layer add your copyright>add your licence number.
Merge visable>new raster layer>add your name( i gave my name a dropshadow>then inner bevel>merge visable.
Thats it you are done. I hope you enjoyed this tutorial. Elizabeth

Saturday 6 February 2010

Dark cravings


blog train here

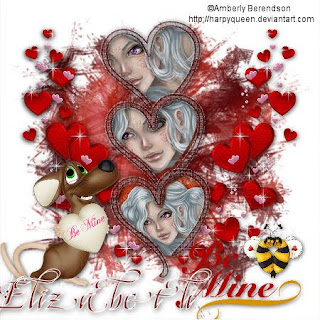
Forever Love


This tutorial was writter by Elizabeth on 06/02/2010 using psp9.
Any similarities to any other tutorial is purley coincidental.
This tutorial is written for those with a working knowledge of psp.
Beautiful kit from here
Mask 106 from here Open and minimise for now
Font of choise
Tube of choise i used a free to use artist
Drop shadow 1,1,58,11, black. dropshadow as you go
Open new image 600x600 >flood fill white
Open paper 7>resize by 20%>c/p to your image>layers new mask>apply>ok
Layers merge group
Open beadheart>resize by 15% move to top left>duplicate move down>duplicate move down>merge the 3 hearts together>hold shift key down & click inside each heart>selections>modify>expand by 10
Open paper 8>resize by 20%> c/p> selections>invert>delete>selections none>move below frame change opacity to soft light.
Open cascading hearts>resize by 35%>c/p>move to right>duplicate>mirror.
Open mouse>resize by 30%>c/p >move to bottom left.
Click inside top heart>selections>modify>expand by 10>
Copy and paste your tube decide which bit of tube you want>do the same on each heart.
Open bemine 2>resize by 20% place bottom right
Image> resize by 75%>add your copyright>licence number.
Image merge visable
New raster layer add your name.
Ihope you enjoyed this tutorial. Elizabeth

Real Teal ftu kit


This tutorial was written by Elizabeth on 06/02/2010 using psp9,
Any similarities to any other tutorial is purley coincidental.
This tutorial is written for those with a working knowledge of psp.
Awesome ftu kits and masks here
I used mask 126. Open and minimise for now
Kit Real Teal
Tube of choise i used a free to use tube
Font of choise
Drop Shadow 2,2,58,11, black, drop shadow as you go.
Open a new image 600x600 flood fill white
New raster layer >flood fill with a colour from one of the elements
Layers>new mask>apply mask>ok>layers merge group
Open frame 1>Free rotate> 90% right>resize by 75%>C/P on to your image
Selectoins>select all>selections float>selections defloat> colour palette> 61836e>flood fill frame>
selections mone.
Open curled notepaper >resize by 75%>c/p move it over frame>click on your deform tool>and move untill same size as the frame
Open rushes >c/p move below frame and to the left
Opendoodle flower>free rotate 33% right
C/Pyour tube place on top curled notepaper>i duplicated the tube>merge down
I think it gives it depth
Image resize by 75%>add your copyright > licence number if needed>merge visable
New raster layer >add your name>layers merge visable.
Ihope you enjoyed this tutorial, Elizabeth